Every blog needs comment feature!
All blogs, including post you are currently writing this, need comment feature.
Because comment feature allows you to receive feedback and serves as a means for further discussion and information exchange through comments.
However, it’s a bit challenging to provide comment feature on static site like Astro.
(Of course, it’s not impossible if you mix Astro Island and tiptap, etc.)
Because Astro being a static site, requires server to store comments.
But! We have the discussion feature of the git repository!
With this, we can add comment feature to posts using Astro.
In this post, we will look at how to add comment feature to Astro using Giscus.
It’s really simple!
What is Giscus ?
Giscus is service that allows visitors to leave comments and reactions on all posts using their Github accounts.
It’s comment feature that uses GitHub Discussions.
This service is free to use and does not require any authentication system.
Since all our comments and discussions are stored in the GitHub repository, we can keep them safe and have control over them.
Now, let’s configure comment feature to Astro using Giscus.
Configuration Giscus for our website
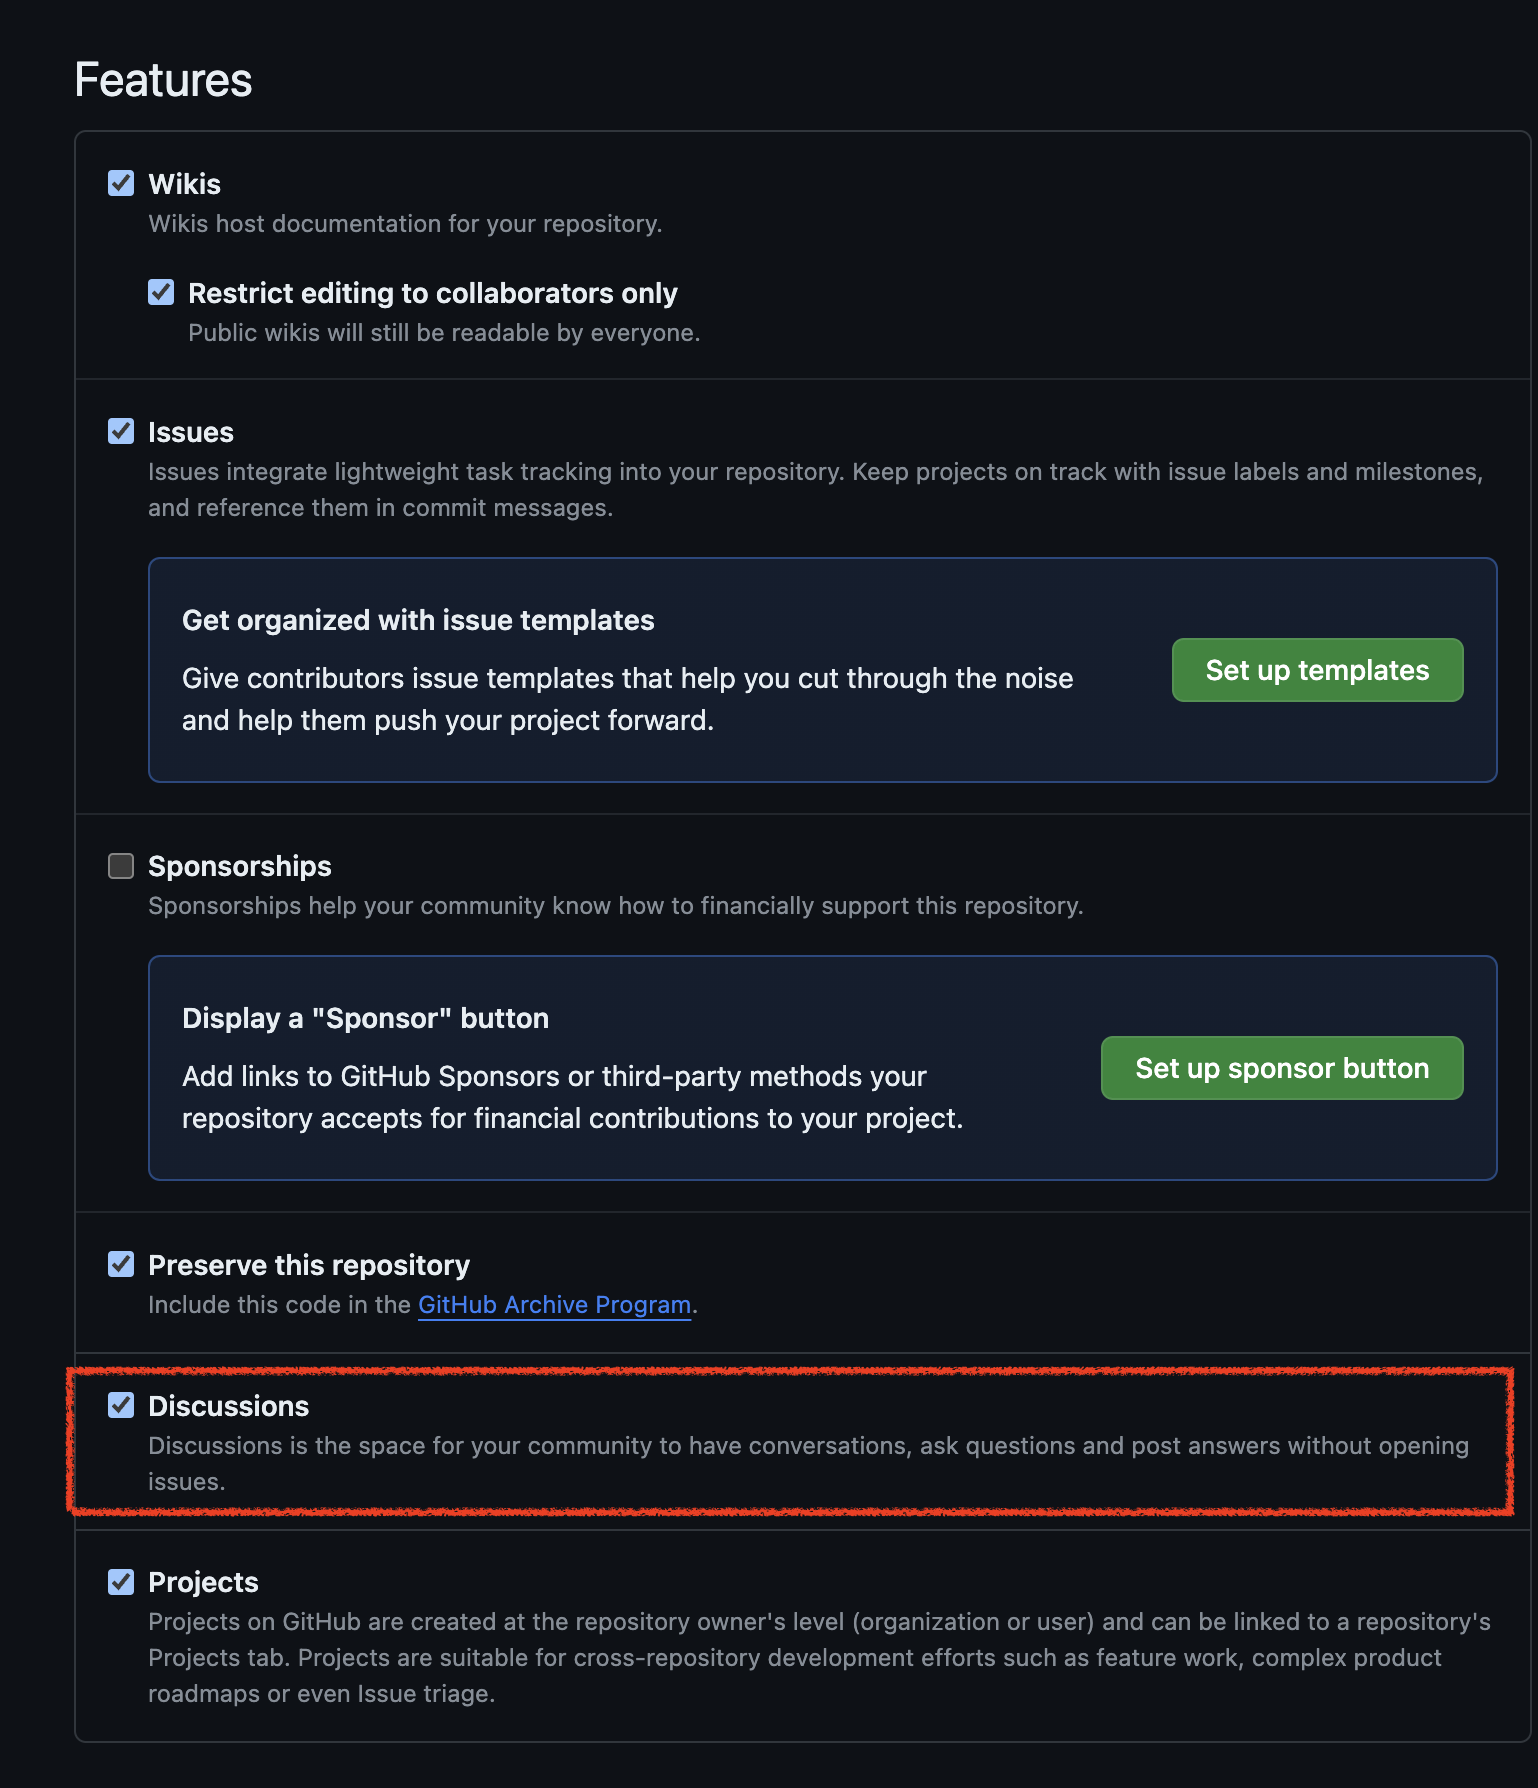
First, you need to enable discussions feature in your GitHub repository.
Before enabling, your website project’s GitHub repository must be public.
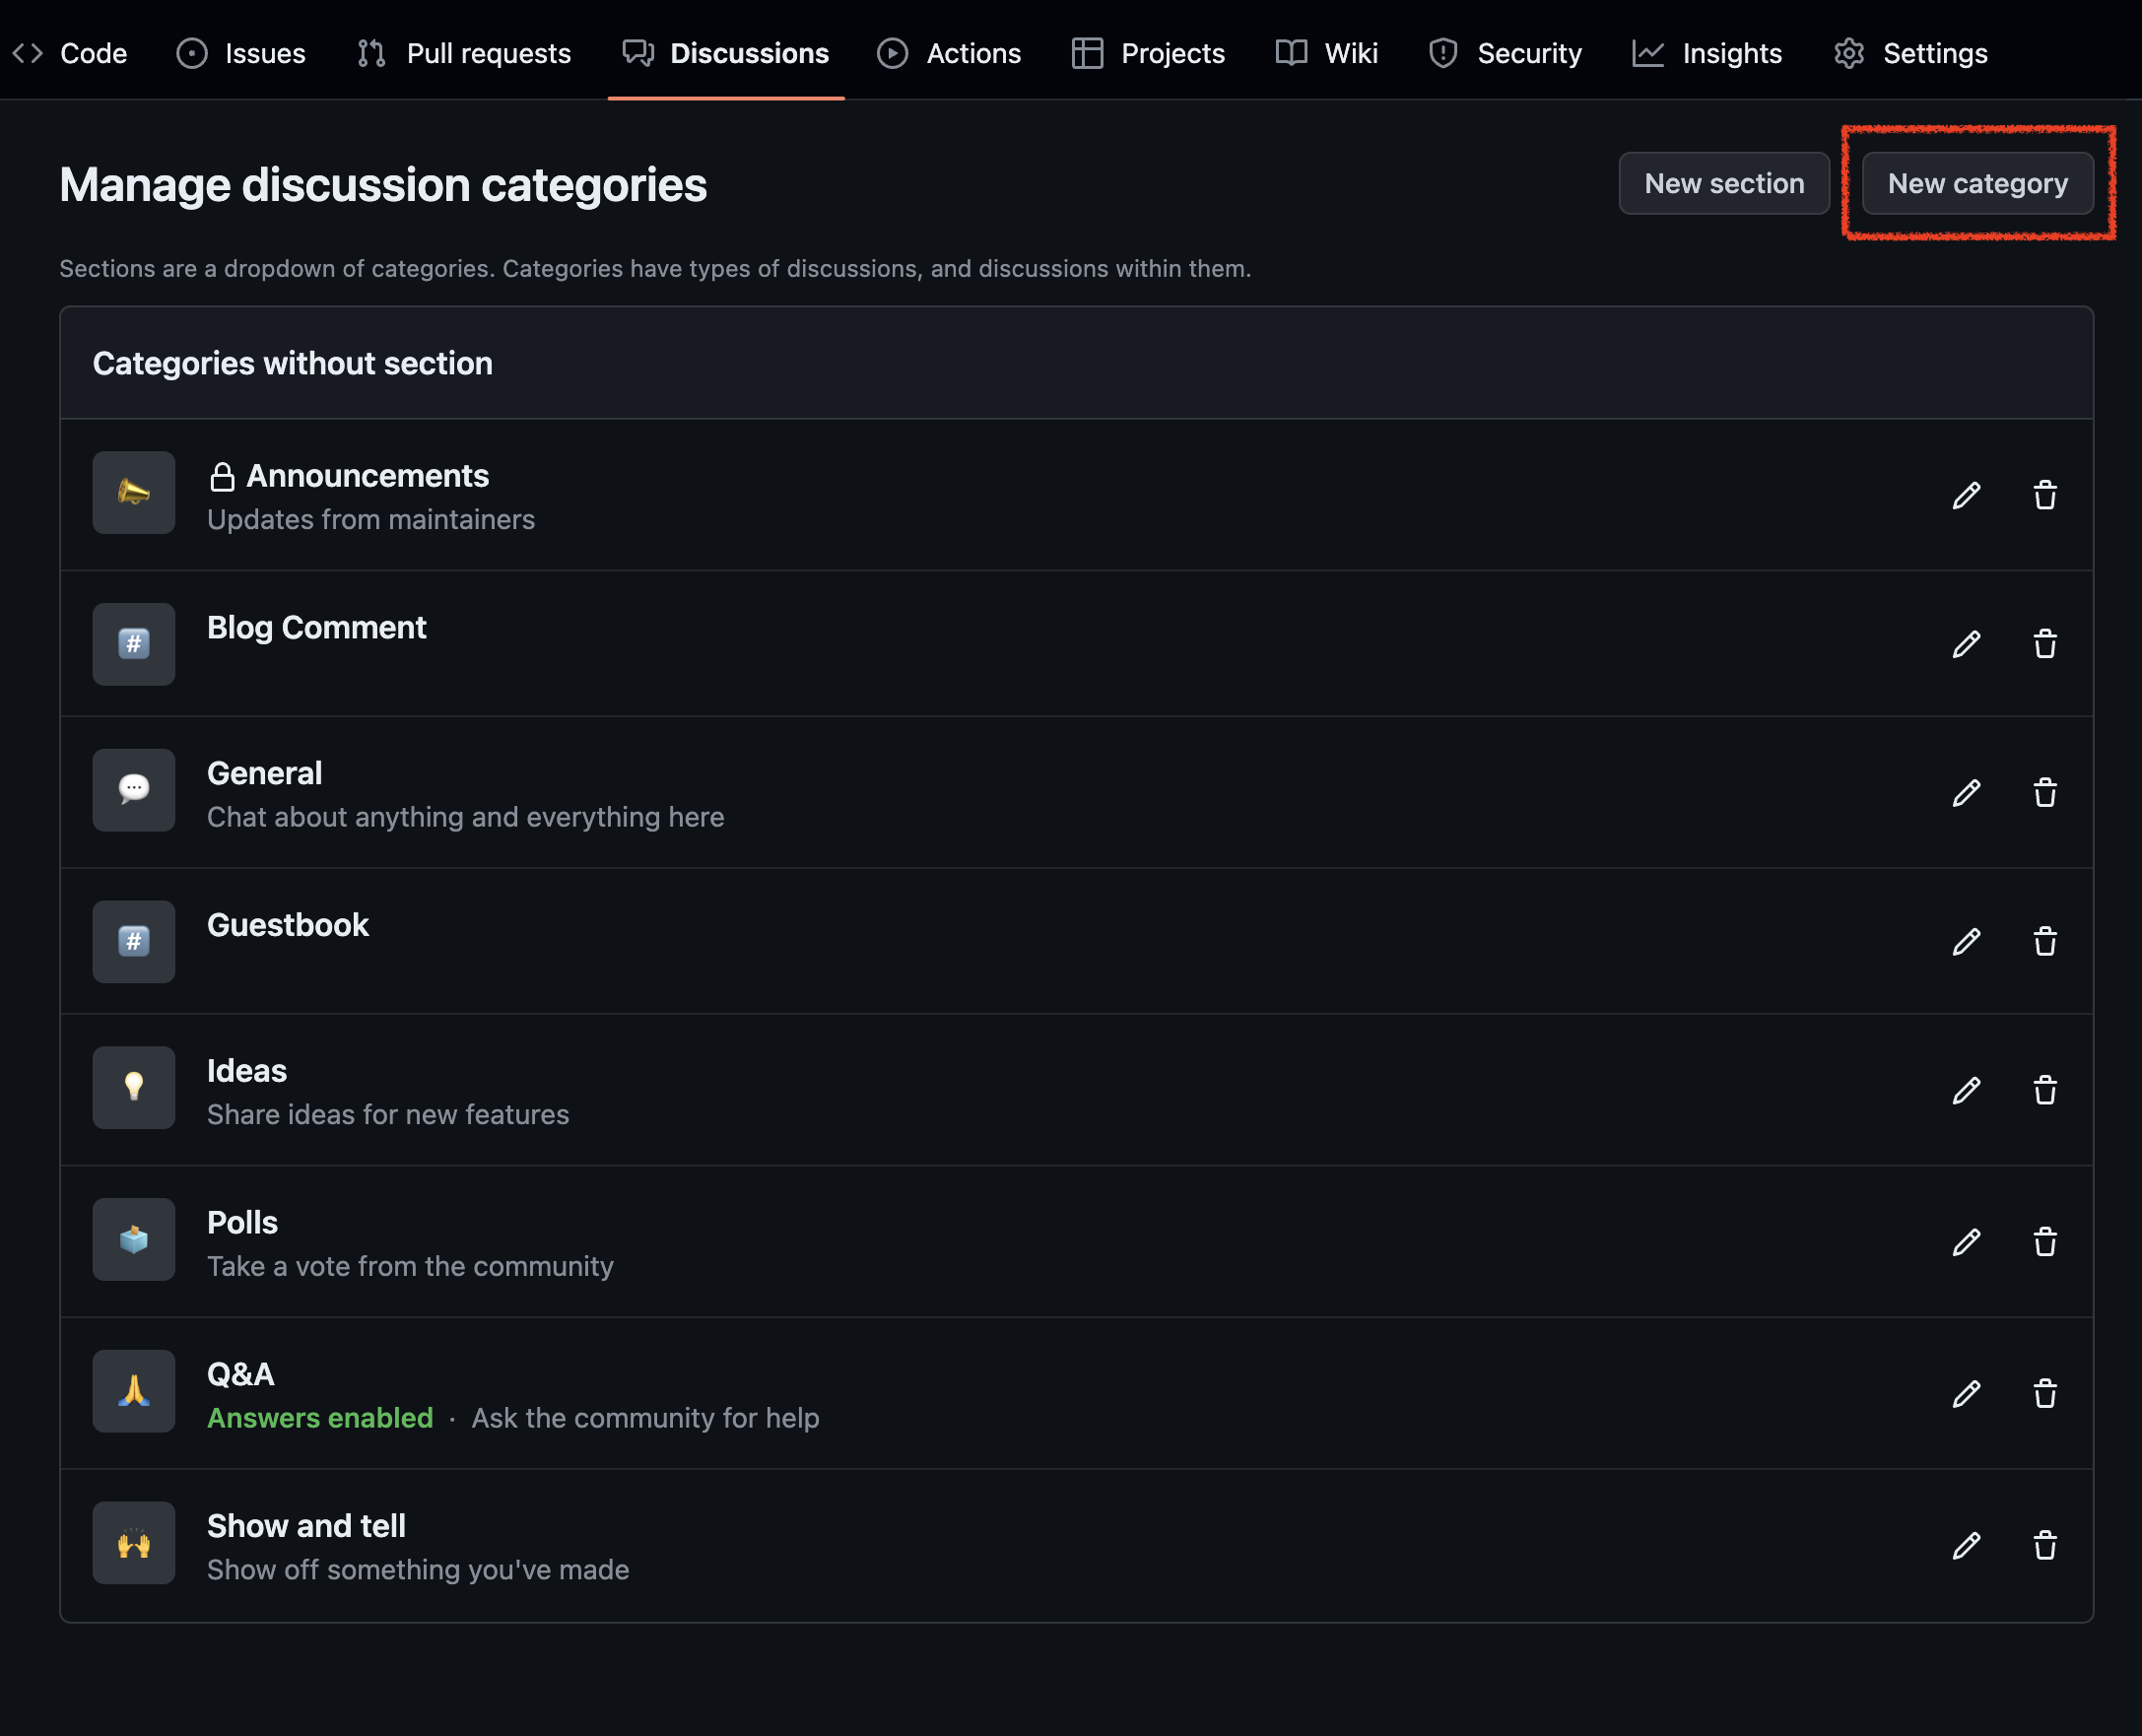
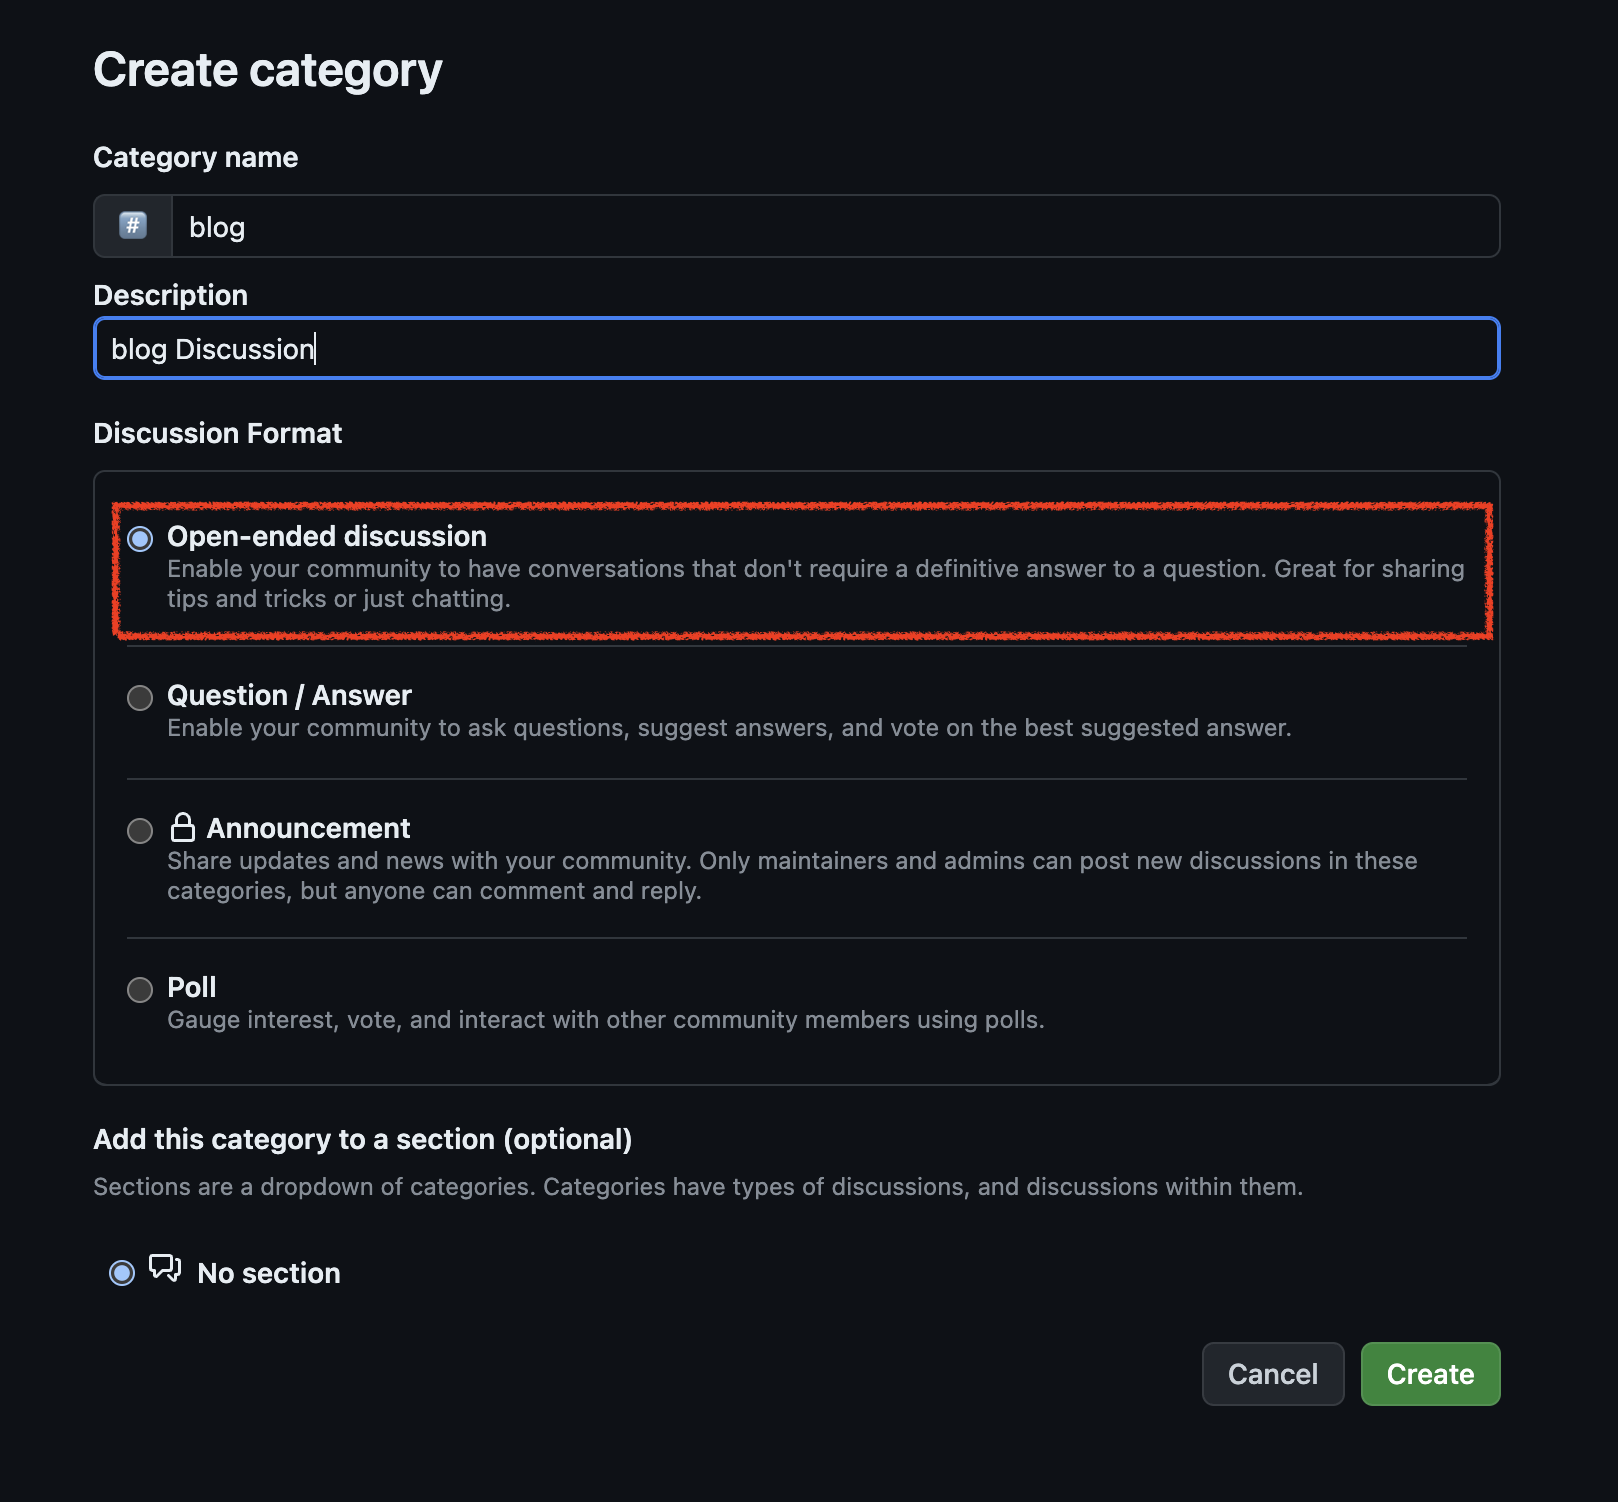
You need to create new category for discussions about comments. Make sure the category is set to open discussions.


Now, you need to go to Giscus and activate Giscus bot.
Once the Giscus bot is activated, it will automatically generate a token after you authenticate with Github and leave comments or reactions.
This bot will generate script that add to your website to enable it!
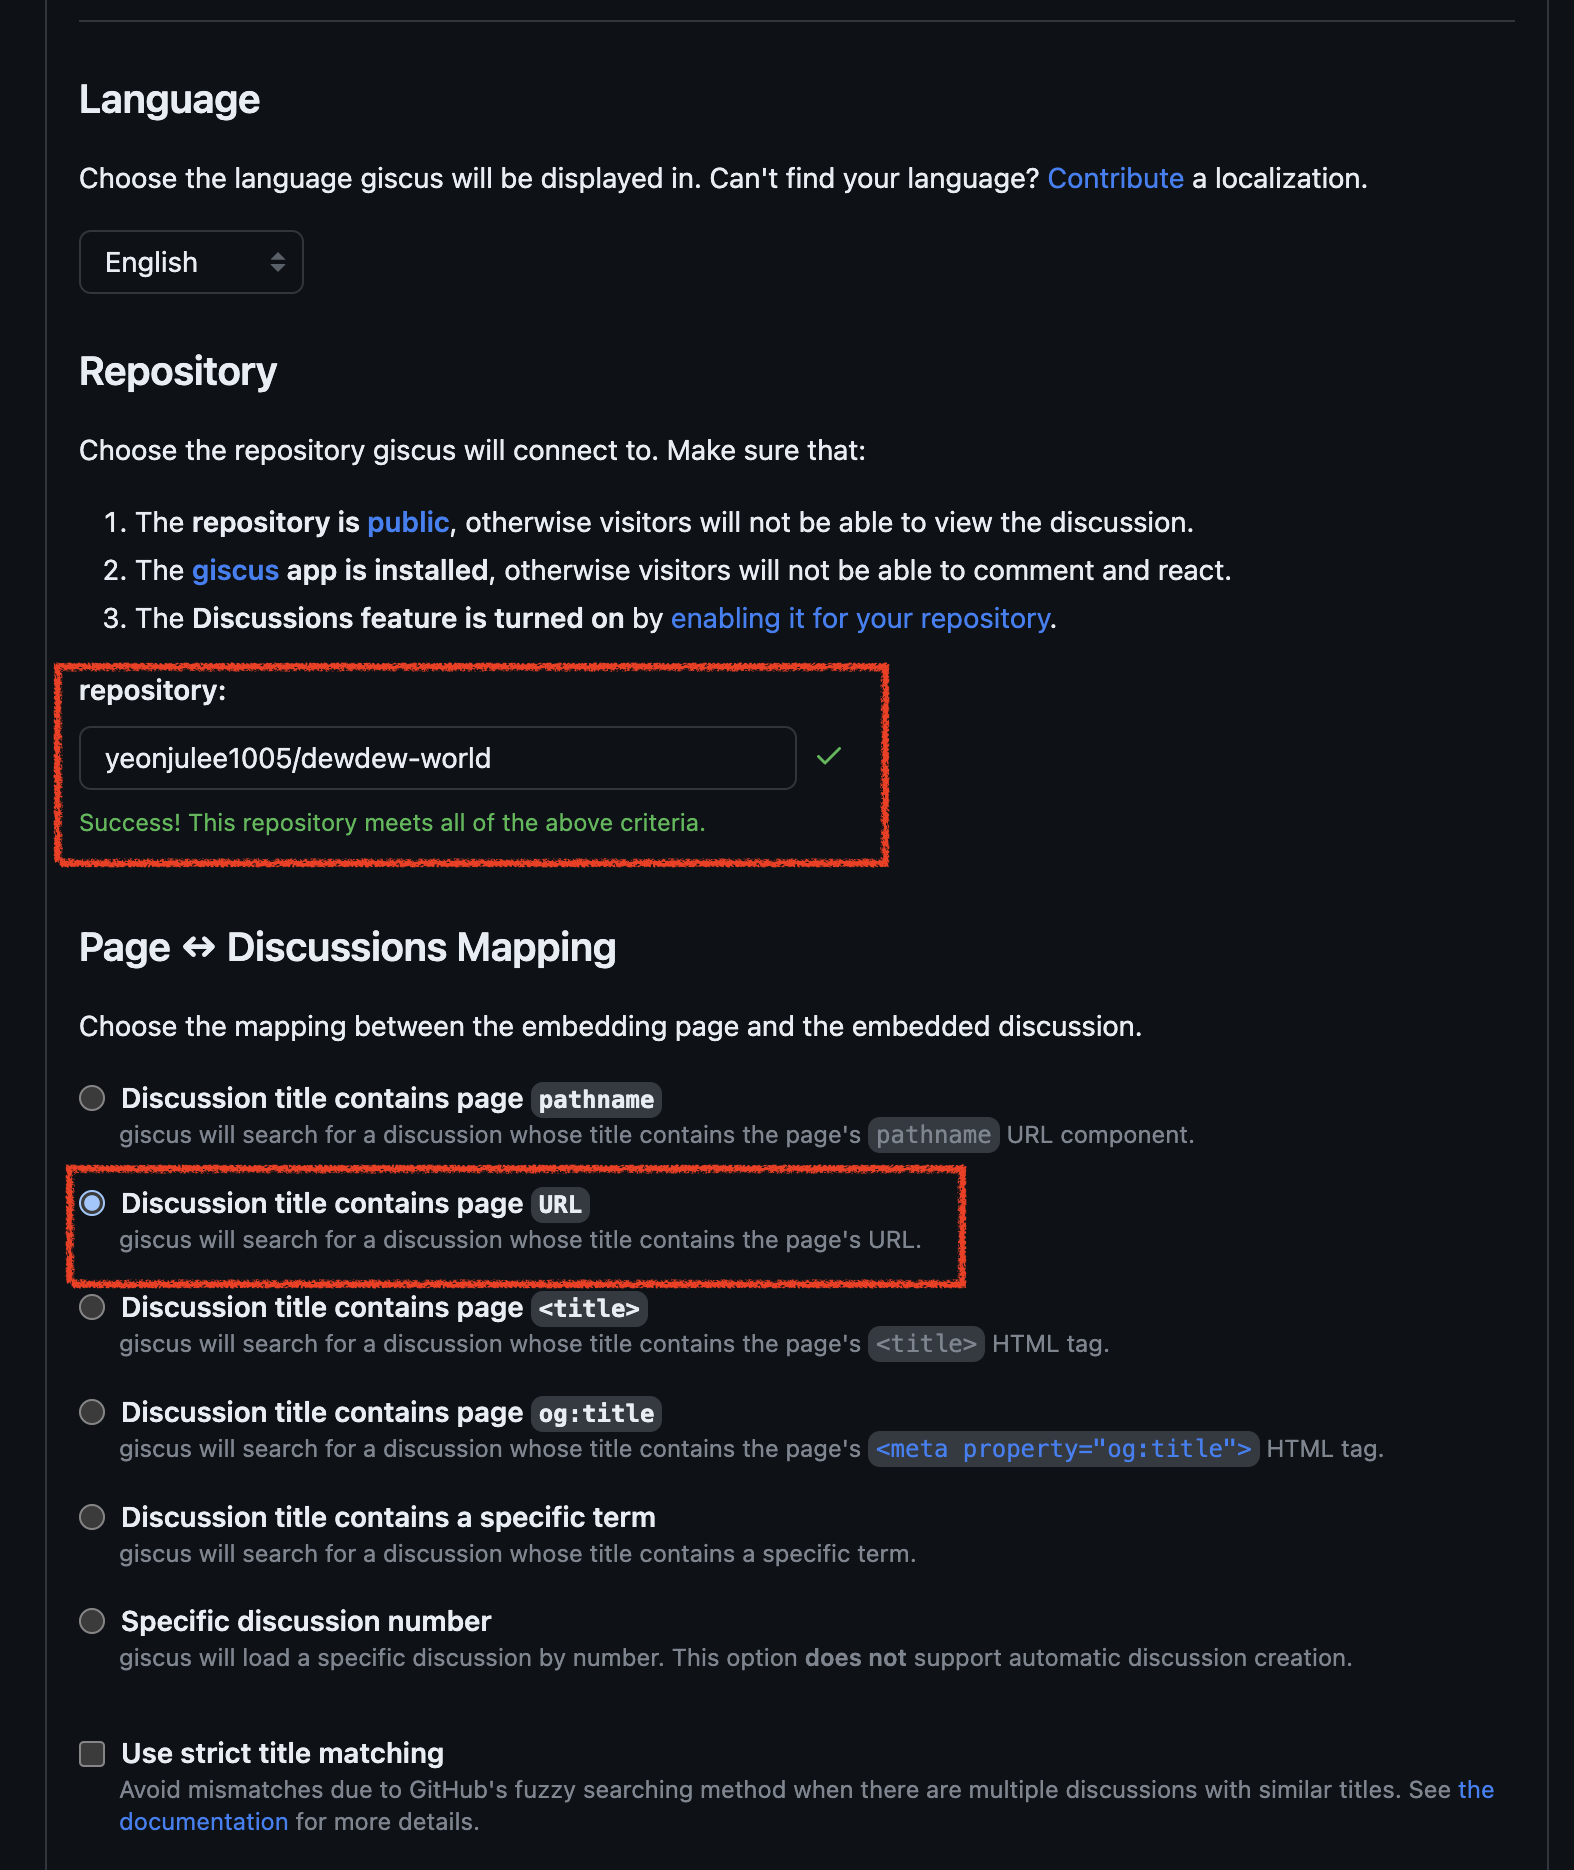
Make sure to select Discussion title contains page URL option for mapping the embedding page and the embedded discussion.

Select Discussion category, and choose features and theme.
And enable options to configure shape and lazy loading option.
For loading approach, choose Lazy to load the comments only when the user scrolls to the comments section.

By selecting these options, you will obtain script code displayed in Enable giscus section!
Add Giscus to Astro
Now that all set!!
You can add script obtained from Giscus to Astro project as follows by creating Comment.astro component like this.
// ./src/compoents/Comment.astro

<section class='giscus mx-auto mt-10 w-full'>
</section>

<script
  src='https://giscus.app/client.js'
  data-repo='repo'
  data-repo-id='repo_id'
  data-category='Blog Comment'
  data-category-id='category_id'
  data-mapping='url'
  data-strict='0'
  data-reactions-enabled='1'
  data-emit-metadata='0'
  data-input-position='top'
  data-theme='light_protanopia'
  data-lang='en'
  data-loading='lazy'
  crossorigin='eager'
  async>
</script>
// .src/pages/[...slug].astro
---
import Layout from '@layouts/Layout.astro'
import Comment from '@components/Comment.astro'
---

<Layout>
  <Comment />
</Layout>
Add giscus module using package manager!
We can install giscus module as shown below to giscus!
// install giscus module
bun add giscus
// ./src/compoents/Comment.astro

<section class='giscus mx-auto mt-10 w-full'>
  <giscus-widget
    id="Blog Comment"
    repo="repo"
    repoid="repo_id"
    category="Blog Comment"
    categoryid="category_id"
    mapping="url"
    reactionsenabled="1"
    emitmetadata="0"
    inputposition="top"
    theme="light_protanopia"
    lang="en"
    loading="eager"
    >
  </giscus-widget>
</section>

<script>
  import 'giscus'
</script>
That’s all!
Now, you can see comment feature on your website! It’s really simple, right?
See you next!


